Making a Cross Stitch Pattern From a Photo
Any photo can be converted. Whether the result is worth stitching comes down to three things you control: how many colours you allow, how many stitches across the grid is, and whether the photo has enough detail per stitch. Get those wrong and you get a mosaic full of stranded single stitches instead of a pattern.
The photo I am using
Everything below comes from one picture, put through the same conversion four times with one setting changed. It is a golden retriever, taken on a porch in late afternoon light, head and shoulders filling most of the frame.
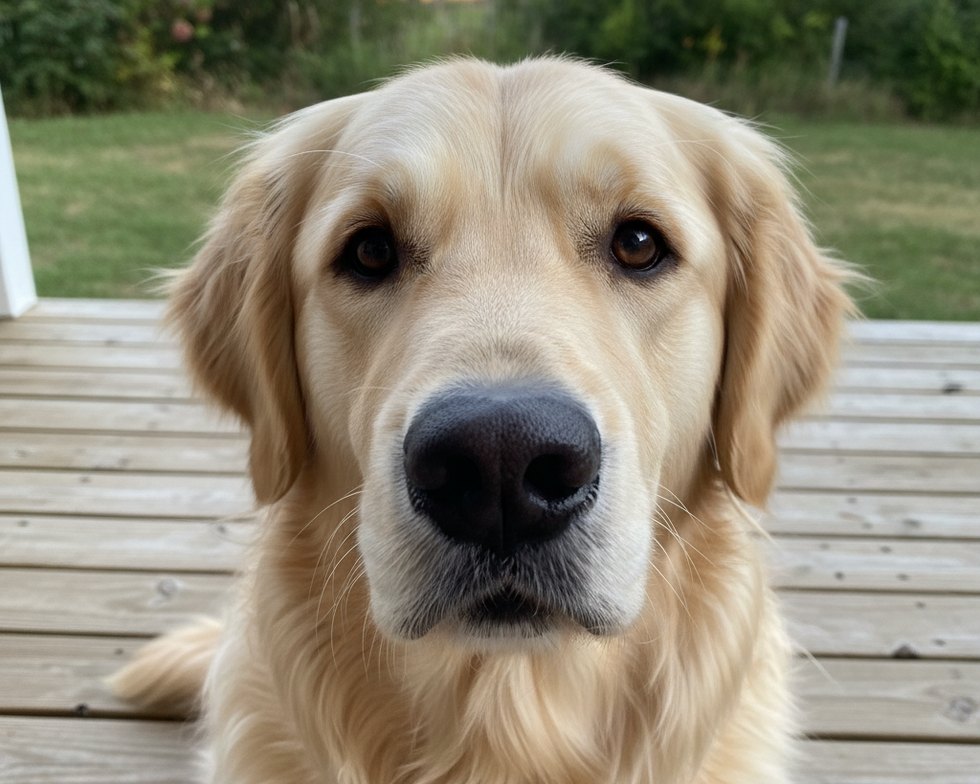
Pets are the obvious subject and they are also a fair test. Fur has fine texture that a grid cannot hold, and the eyes and nose have to survive or the animal stops being that animal. The chart is 140 stitches across by 112 down, which on 14 count aida finishes at 10 by 8 inches.
Colours: the setting that ruins most conversions
Every photo converter asks how many colours you want and most people answer with a big number, because the preview looks better. Here is what a big number actually buys.
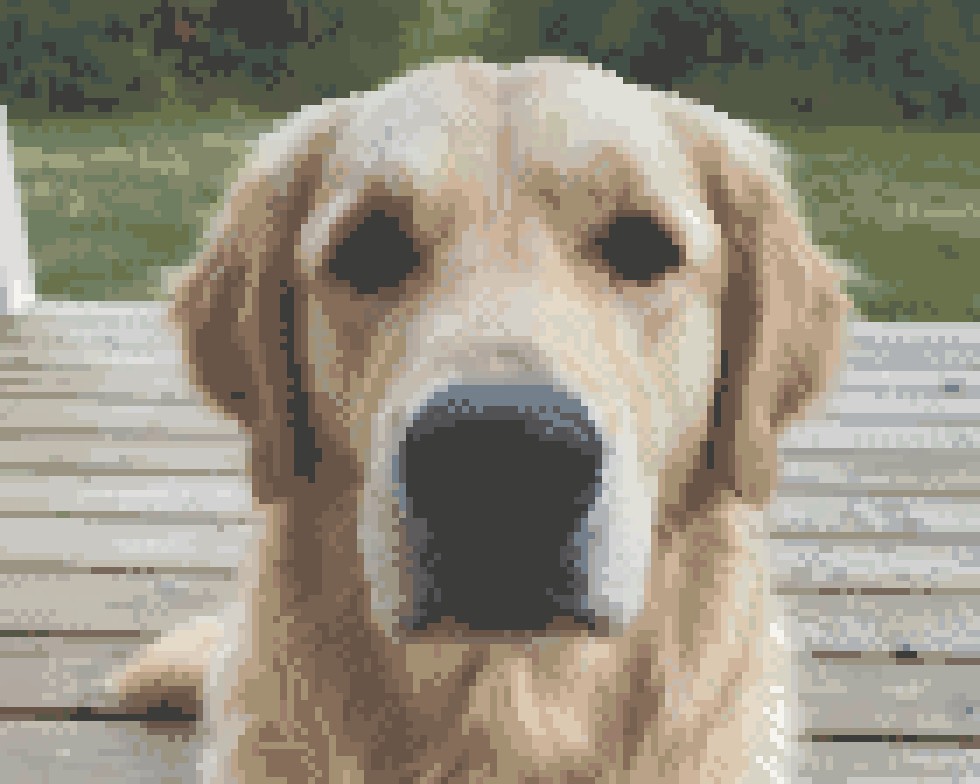
At 29 colours the picture is lovely and the chart contains 124 stitches that are alone: a single square of one number, surrounded on all sides by something else. They collect wherever the picture changes tone slowly rather than wherever it looks busy, because on a smooth gradient the nearest thread flips between two neighbours from one square to the next. On this photo that turned out to be the porch boards, not the grass, which is the opposite of what I expected. There is a whole article on that: see below.
At 12 colours there are 25.
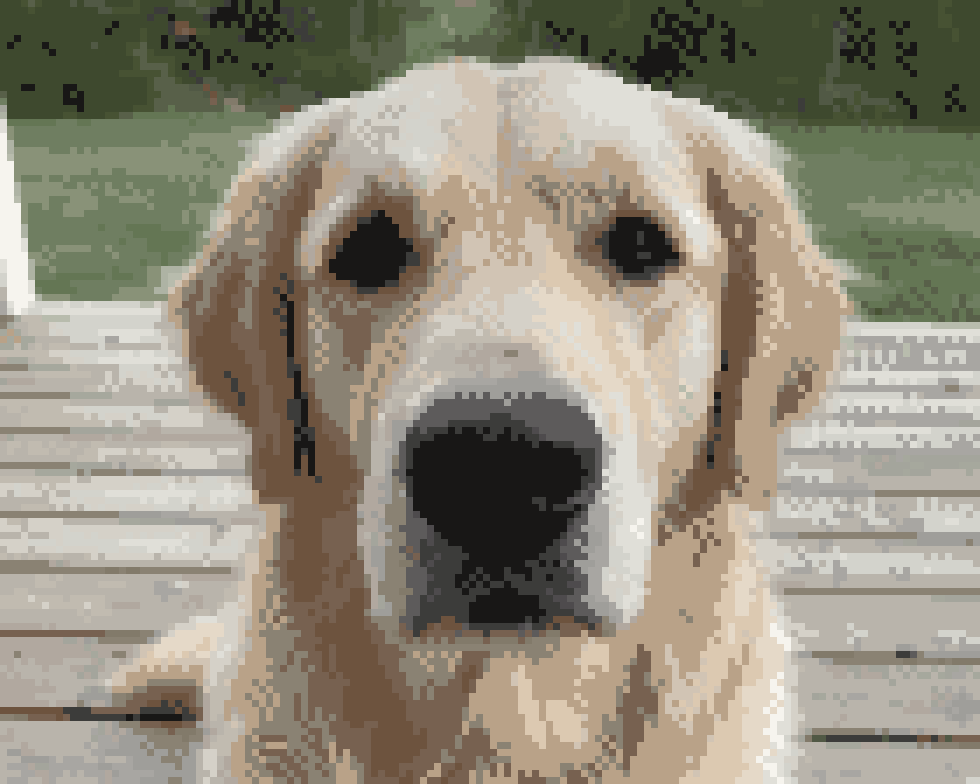
Those isolated squares have a name, confetti, and where they come from is worth understanding before you accept a palette.
Look at the two for a while and the second one is not obviously worse. The grass has gone slightly flat, the dog has not. And a hundred fewer stranded stitches is a real difference in the hand, because each one means anchoring a thread, making one cross, and anchoring it again.
| Colours allowed | Colours used | Stranded singles | Skeins | Hours |
|---|---|---|---|---|
| 30 | 29 | 124 | 30 | 22.4 |
| 12 | 12 | 25 | 19 | 27.7 |
| 9 from a stash | 8 | 12 | 16 | 22.5 |
| 1 (DMC 310) | 1 | 0 | 9 | 19.2 |
Two things in that table surprise people.
The first is that the shopping list shrinks fast: 30 skeins down to 19 down to 16. That is not because less thread gets used. It is because every colour needs at least one whole skein however little of it appears, so a palette of 29 is paying for a lot of nearly empty skeins.
The second is that twelve colours takes longer than twenty-nine. 27.7 hours against 22.4. With fewer numbers to hand, the shading has to come from somewhere else, and it comes from denser stitches: double crosses, which take a bit over twice as long as a plain cross. You are not saving work by using fewer colours. You are trading a shopping list for evenings, which is often the trade you want, but it should be a decision rather than a surprise.
Enough photo per stitch
A stitch cannot hold detail smaller than itself, so a chart can only be as sharp as the number of squares you give it. The rule of thumb worth knowing is about seven pixels of photograph per stitch, measured inside the crop.
For the 140 by 112 chart above, that is 980 by 784 pixels of actual picture. Any phone from the last decade clears that easily for a photo you took yourself. What does not clear it is a face cropped out of a group shot, a screenshot, or an image saved off a messaging app that quietly halved it on the way.
If a converter does not check this, it will happily produce a chart anyway, and you find out forty hours later that the eyes were never in there to begin with. The check is cheap and it should happen before you commit to a size.
Size, count and inches
Three numbers are locked together and you only get to pick two:
- stitches across (the grid)
- fabric count (holes per inch)
- finished inches
The same 140 by 112 grid finishes at 12.7 by 10.2 inches on 11 count, 10 by 8 on 14 count, and 7.8 by 6.2 on 18 count. Nothing about the chart changed. Only the cloth did. Which one to pick is really a question about your eyes and your patience, and it is worth reading up on what fabric count actually does before you buy either the fabric or the frame.
Then add margin. Three inches on each dimension, so 13 by 11 inches of aida to cut for the piece above. That is not generosity, it is what a hoop and a frame need to hold on to.
When the photo will not work
Some pictures cannot be rescued by settings, and the honest answer is to take another one.
- Nothing is in focus. Blur reads as mud at every colour count.
- The subject is small in the frame. Crop first, then decide the size.
- It was shot in portrait mode. The fake background blur produces exactly the smooth gradients that generate confetti.
- Strong colour cast. An orange indoor photo will get stitched orange, because the converter is matching what is there, not what you remember.
- Busy background. A hedge behind a face costs you half your palette. Blur it, crop it out, or remove it.
The one that costs nothing to try
If a photo is fighting you, try it in a single colour before giving up.
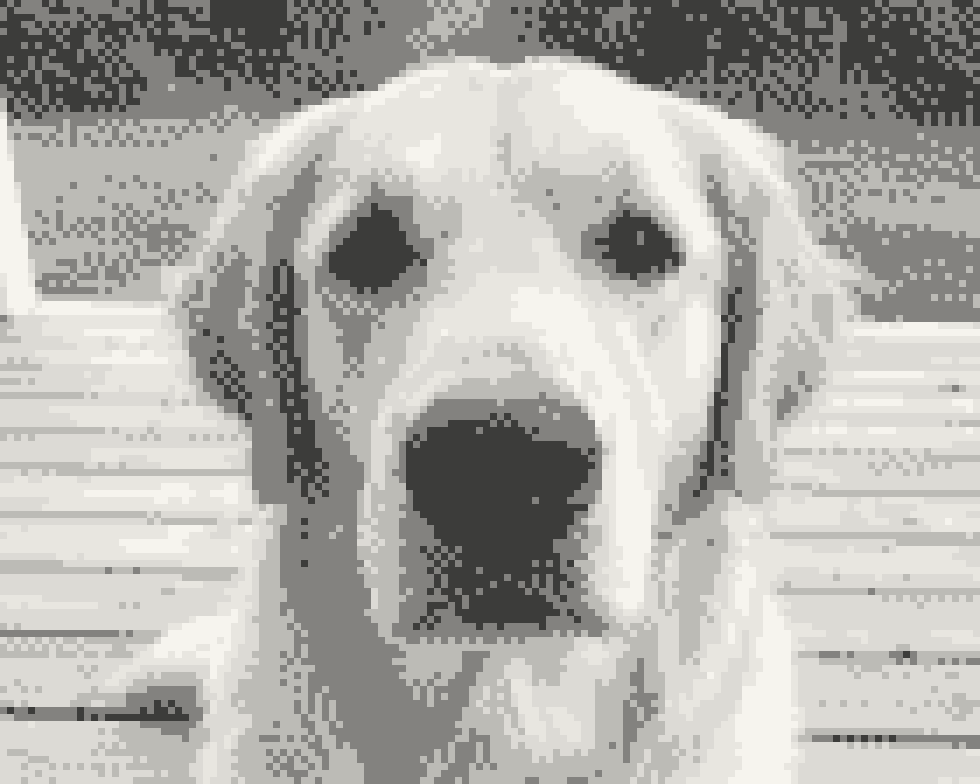
That is one skein number, DMC 310, and no confetti at all, because with one colour there is nothing to flicker between. Tone comes from how densely the square is filled instead: nothing, a seed stitch, a backstitch, a half cross, a full cross, a double cross. Six steps, one thread, 9 skeins.
It is also the cheapest way to find out whether a photo has the shape it needs. If it reads in one colour, it will read in twelve. If it does not, more numbers will not save it.
Once you have a chart you are happy with, the next question is usually where to put the first stitch, which is a whole small skill of its own, and after that, how many skeins to actually buy. The arithmetic behind that shopping list is set out in how much floss a piece really takes. Every number on this page came out of the model that Flossgrid runs on, from that one photo of that one dog.
Questions that come up
How many colours should a photo pattern have?
For a portrait, somewhere between ten and twenty is usually the sweet spot. Below ten you start losing the shape of a face. Above twenty-five you are mostly buying stray single stitches in areas that are out of focus anyway. The honest test is not how the preview looks on a phone screen at three inches wide, it is how many isolated stitches the chart contains, because those are the ones you will curse at.
What size photo do I need?
About seven pixels of photo for every stitch, measured inside the crop rather than in the original file. A 140 by 112 chart therefore wants at least 980 by 784 pixels of actual picture. Anything less and the averaging that turns pixels into squares has nothing left to average. A photo from any phone of the last ten years is fine; a photo cropped out of a group shot usually is not.
Why does my pattern have single stitches everywhere?
Because the converter matched every square to its closest thread independently, and in a smooth gradient the closest thread flips back and forth between two numbers. This is called confetti. The fixes, in order of how much they help: use fewer colours, blur or remove the background, and crop tighter so more of the frame is the subject.
Can I use a photo of my dog or cat?
Pets are the single most common subject for photo patterns, and they convert well because fur has strong local contrast and the eyes and nose give the eye something to lock onto. Take the picture at the animal's head height in daylight, fill the frame with the head and shoulders, and do not use a phone's portrait mode, which fakes a blur that the converter then dutifully stitches.